Tangerine Scream
Long term build (and now upkeep!) diary of my Kawasaki ZX9 powered Locost Se7en
I know that I have one still fitted but it never worked correctly; the sensor for it is still there but the display and wiring have been removed.
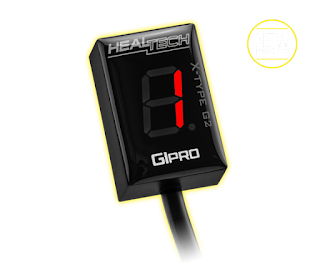
I have ordered a Healtech GIpro X-Type G2 with a wiring loom for a ZX9R. Should be relatively "plug and play" but I want to fit it all in properly.
Healtech also some quite interesting other little electronics gizmos on their site. I have already lined another up, but I'll not get ahead of myself, let's fit this one first.
I needed to adjust the mixture screws, which are cunningly hidden underneath the carbs. It helped that I had a spare set of carbs to help get the right size screwdriver and also to get a feel for the adjustment of the sprung screw.
A little perseverance (and a few scratches) and the job is done. Needs a session out in the open for a while to tweak them properly, but they are in the ballpark.
Just noticed in the picture, a bit more of the powder coating coming off... I'll add it to next winter's jobs.
Bolts are all torqued up properly and it's ready to go.
Weather is the only thing stopping a test drive; miserable drizzle and showers :(
I've used a tywrap on the CV boot as I think it really doesn't matter!
Ladders were used as a make-shift support, the shaft was suspended by lockwire threaded through a circlip. Both splined ends were protected by frog tape, the shaft was degreased, dried, and a couple of coats of etch primer were applied.
Leaving it to harden properly overnight.
The picture shows Wee Black Cat conducting Quality Assurance duties.
A weight comparison of the two driveshafts.
The old one weighs in at 1921g
The new one weighs in at 1504g
417g lighter! That's not bad.
If I get the other driveshaft swapped out too, that's nearly a kilo of weight saving.
Did I also mention that the new driveshaft is also very shiny!
I did a quick check of the CV joint fit over the splined shaft. I wanted to see how much tighter brand new splines were compared to the old ones.
The difference is "night and day". Absolutely no movement in them at all. I'm a happy bunny.
Compared to the old one, it's very shiny.
The single outer recess for a circlip is not a problem either. The reason the inner recess is not machined is that it can apparently induce a failure point. Either way, I'm not worried.
The shaft has an overall 400mm length, which is the critical measurement for the overall shaft.
Having sourced a good source for a replacement, I'm going to measure the other shaft so I can get a matched pair.
It turns out that these shafts and CV joints are popular in the autograss community, so they are used to a hard life!
Firstly, even with the naked eye, the shaft doesn't appear to be straight. That's not exactly a good start.
I know the tear line in this oil absorption sheet isn't exactly an engineering datum but it's obvious that something isn't quite true (literally)
The Road Vehicles Lighting Regulations (1989) state that a rear fog light is mandatory. However, as long as it is adequately spaced away from a rear brake light and within a certain height band, there is pretty much free reign for the actual specs of the lamp.
The size, intensity and wattage are all not specified. For safety reasons, it wouldn't be prudent to go stupidly small but there are some quite powerful small LED packages out there. I shall research it some more, especially if my current LED cluster is starting to gradually fail.
The plastic lamp holders are old and a little perished. They do not grip the lamp as tightly as they used to. I could get new holders but if the car fails its MOT on headlight aim, then I will be replacing the headlamps anyway.
As a temporary fix, I have tywrapped the crimp connectors together so they grip the holder tighter, thus gripping the lamp tighter. That's the theory anyway. Let's see how they stand up to a bit of road vibration.
I wanted to make it a little better and introduce a rubber bobbin.
A wee ebay purchase later and I have four M8 x 25mm bobbins. I ordered four because you never can tell... that and the fact that they only did them in packs of four.
It makes it a little neater and also has the benefit of raising the exhaust can a bit.
It's the lowest part of the car and although it hasn't contacted the road yet, it's only time.
A small job but an improvement nonetheless.
I'm a little concerned about the droop as the weight of the exhaust is twisting the bobbin. I could always alleviate the problem by adding another mounting strap and sharing the load between two bobbins?


